

You’ll find the latest driver from its official website or alternatively you may download the same driver from the download section given below.
In the download section, I have shared the Epson L485 driver download links for Windows 11, 10, 8, 8.1, 7, Vista, XP (32bit / 64bit), Server 2000 to 2022, Linux, Ubuntu, and Mac 10.x, 11.x, 12.x, 13.x Ventura operating systems.
I have divided this guide into two sections: download section and installation section. In the download section, I have given instructions to download the appropriate printer drivers from this guide. In the installation section, I have explained the correct installation process of these Epson L485 printer drivers.
Steps to Download Epson L485 Driver
All the operating system versions supported by this Epson printer have been mentioned in the OS list given below. Follow our download steps to get the appropriate Epson printer and scanner drivers for your preferred OS version:
Step 1: Choose the operating system from our OS list where you want to install this printer.
Step 2: Click on its full feature download link to download your full feature Epson L485 driver setup file. However, if you want to download the Epson L485 basic printer driver setup file, then click on the printer driver download link. In order to download the Epson L485 basic scanner driver setup file, you should click on the scanner driver download link.
If you want to simultaneously install both the printer and scanner drives of this printer on your computer, then download the full feature driver. However, if you download the basic drivers, then you will have to install printer and scanner drivers separately.
Epson L485 Driver for Windows
Driver for Mac
Driver for Linux/Ubuntu
OR
Download the driver directly from the Epson L485 official website.
How to Install Epson L485 Printer & Scanner Driver
In order to get the best performance of this Epson all-in-one printer you must install its printer drivers by using their proper installation method.
For your assistance, I have shared below the detailed installation guide for the full feature driver and basic driver (inf driver). Read the guide, which is appropriate for your driver, then follow its instructions in their correct order to properly install the Epson L485 printer drivers on your computer.
1) Install Epson L485 Printer Using Full Feature Driver
In the following installation guide, you will learn about how to install the full feature Epson L485 driver on a Windows computer.
For each installation step I have provided an image file so that you can fully understand the installation process and execute it without any confusion.
I have explained the installation process in Windows 10 OS, but you can follow these steps for all the versions of the Windows operating system.
Steps:
- Run the full feature driver file downloaded from this page and wait for the setup program to load itself on your computer.

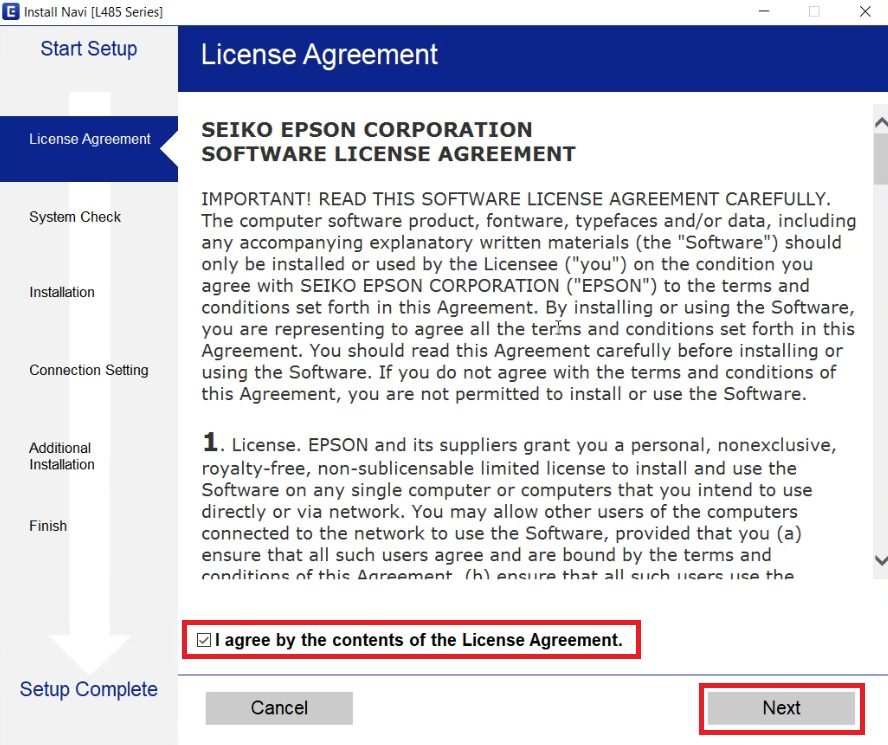
- In the License Agreement screen, select the ‘I agree by the contents of the License Agreement’ option to accept the Seiko Epson Corporation Software License Agreement, then click on the ‘Next’ button.
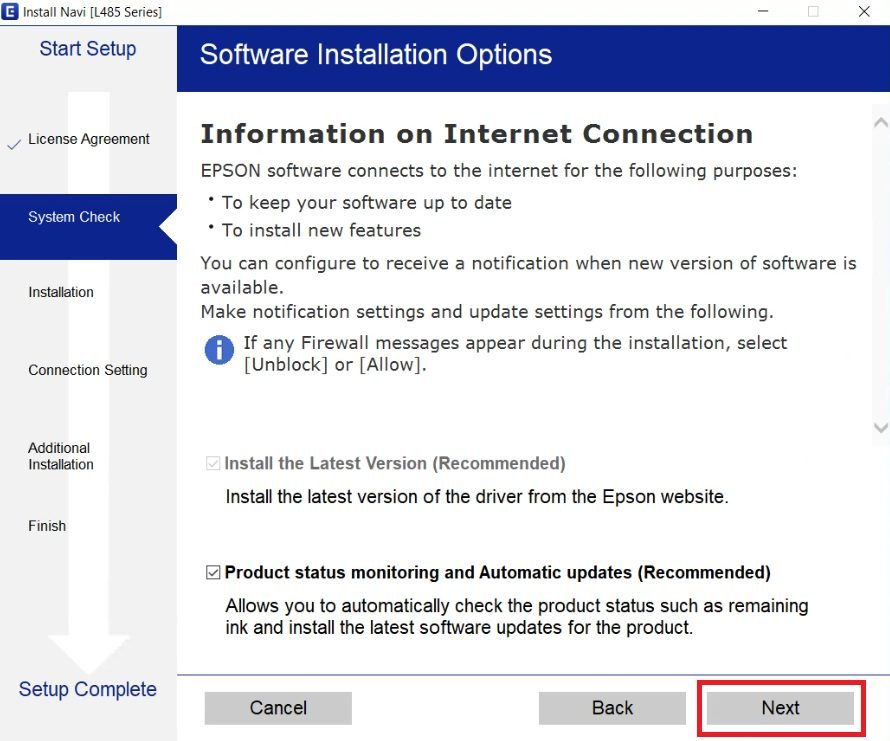
- You will be informed that the setup program will use your internet connection to download the necessary drivers and software on your computer. Also, if the security program on your computer warns you against proceeding with the driver installation process, then ignore that warning and continue with the installation process. Click on the ‘Next’ button to proceed.
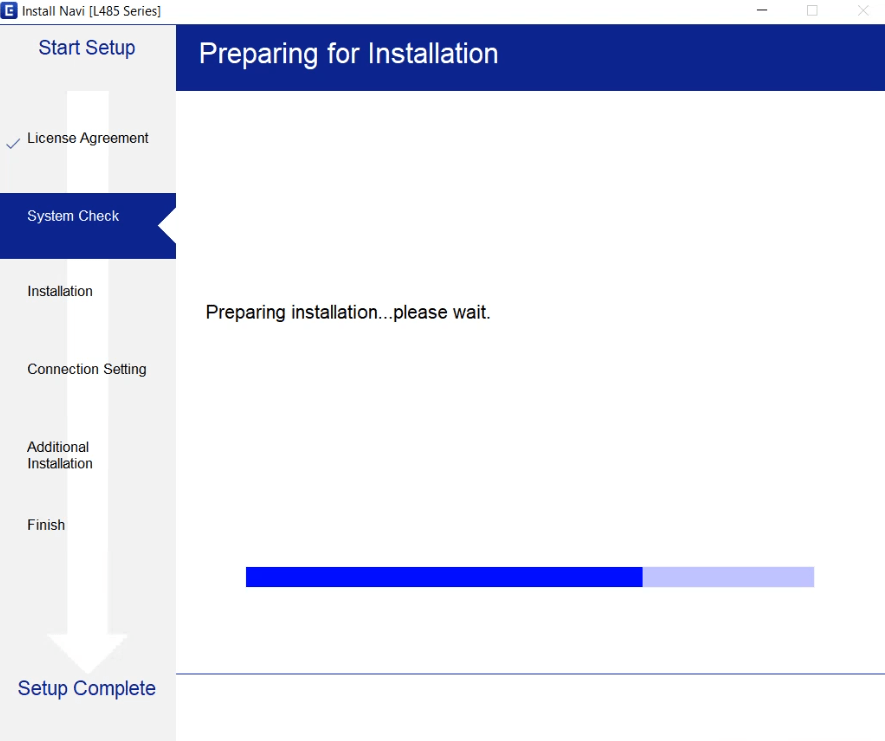
- Wait for the setup program to prepare your computer for the driver installation.
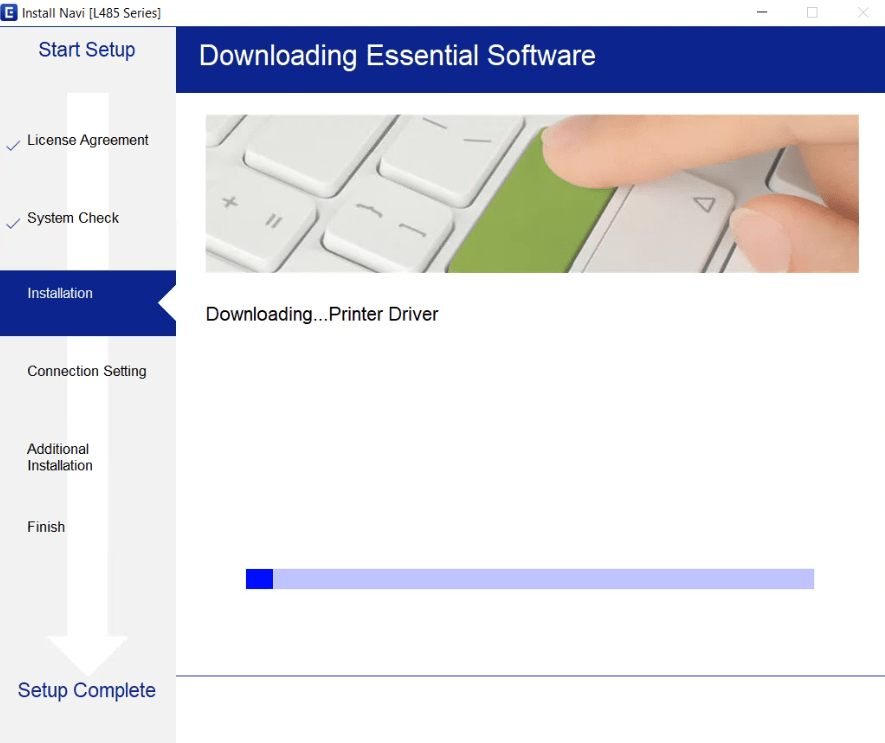
- Wait as the setup program downloads the necessary drivers and software on your computer.
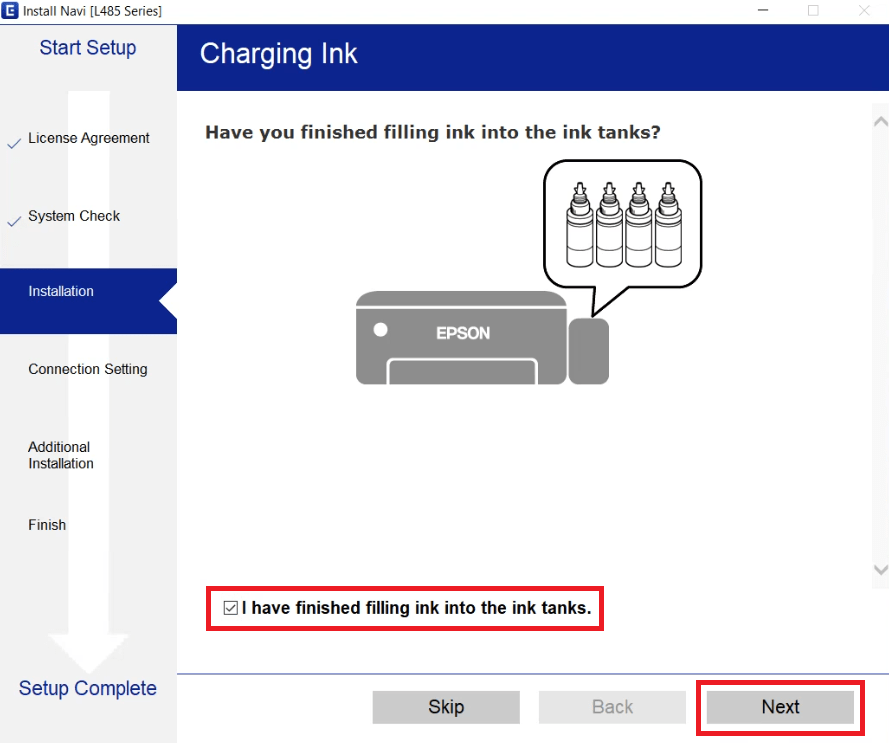
- Make sure that you have filled the ink tanks of your printer with the ink from the ink bottles, then choose the ‘I have finished filling ink into the ink tanks’ option, Finally, click on the ‘Next’ button.
- Read the information provided in the screen, then click on the ‘Next’ button.

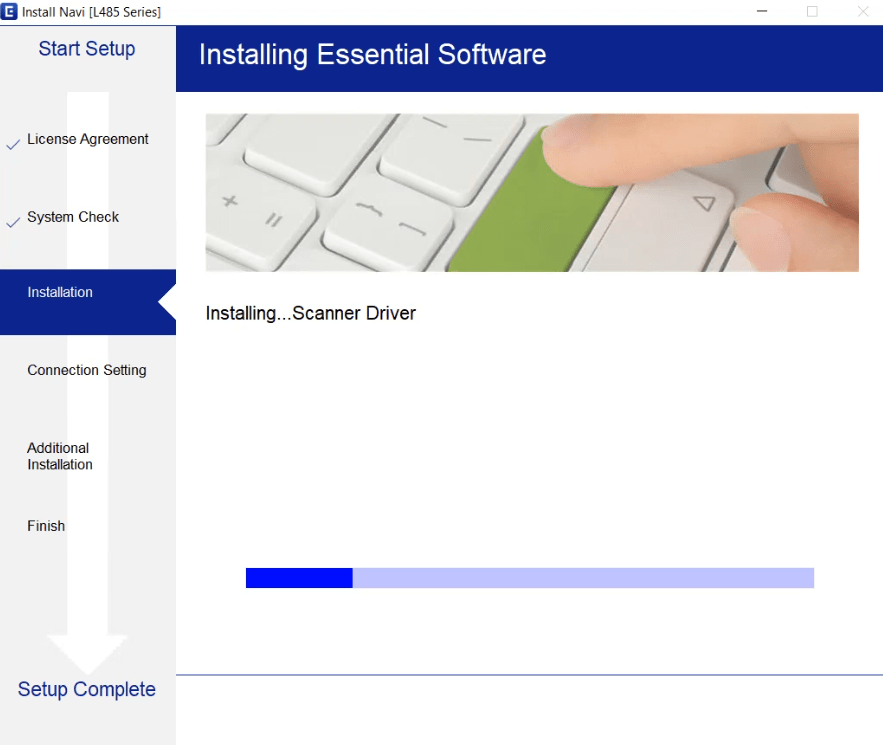
- Wait for the installation of the printer drivers and software to complete on your computer.
- Wait for the setup program to check the environment.

- In the Connecting your Printer screen, choose the ‘USB Connection’ option, then click on the ‘Next’ button.

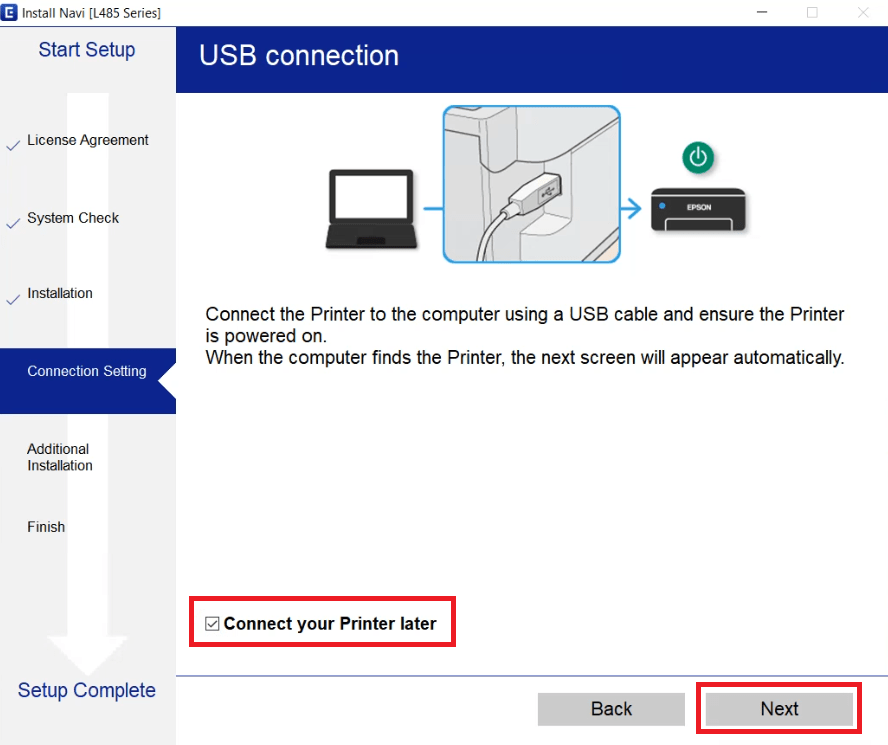
- When the USB connection screen appears, then you can connect your Epson printer with your computer by using a USB cable and follow the onscreen instructions to complete the driver installation process. However, if you want to connect your printer later, then choose the ‘Connect your Printer later’ option and click on the ‘Next’ button.
- In the Setup Complete screen, click on the ‘Finish’ button to close the setup program.

That’s it, you have successfully completed the installation of the Epson L485 driver package on your computer. You can now start using your Epson printer after connecting it with your computer via a USB cable.
2) Install Epson L485 Printer Using Basic Driver
All users who want to install this Epson printer using its Epson L485 basic drivers must read this installation guide.
In this guide, I have described in simple steps the right method of installing the Epson L485 basic printer drivers on a Windows computer. You can follow the steps given below for all versions of the Windows operating system.
Steps:
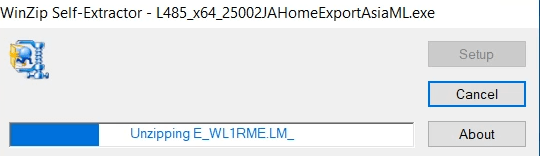
- Run the basic printer driver file downloaded from here and wait for the self-extractor program to unzip the installer files on your computer.
- In the Welcome screen, choose the ‘Epson L485 Series’ printer model, make sure that the ‘Set as default printer’ option is selected, then click on the ‘OK’ button.

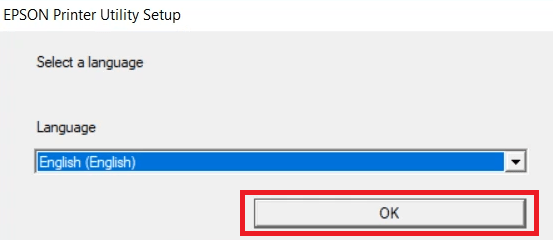
- In the Select a language screen, select your preferred language, I have chosen the ‘English’ language, then click on the ‘OK’ button.
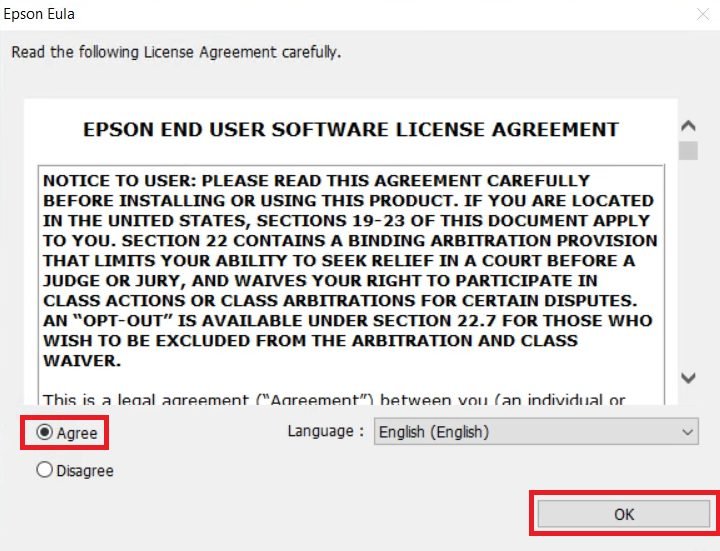
- In the Epson Eula screen, choose the ‘Agree’ option to accept the Epson End User Software License Agreement, then click on the ‘OK’ button.
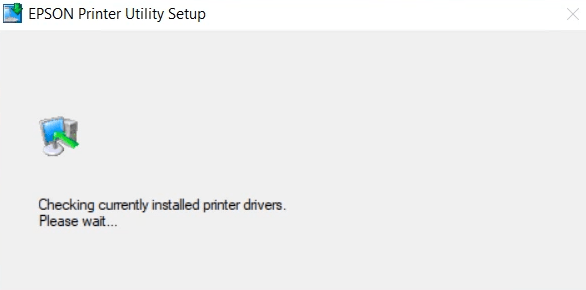
- Wait for the setup program to check for the printer drivers which are currently installed on your computer.
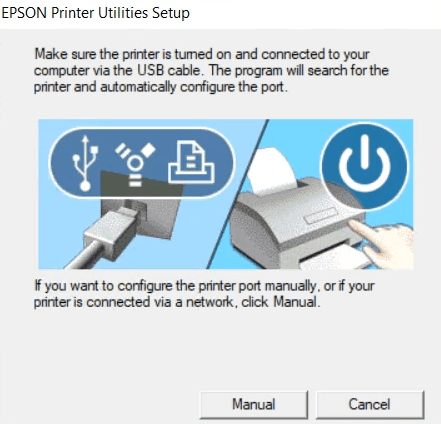
- Connect your Epson printer with your computer by using a USB cable, then switch on your printer. Wait for the setup program to detect your Epson printer.
- Wait for the setup program to complete the driver installation process.

- When you see the message that the driver installation has completed successfully, then click on the ‘OK’ button to close the installer program.

That’s it, installation of the Epson L485 INF driver has successfully completed on your computer. You can start using your Epson printer for printing documents and images.
However, if you want to use the scan function of this Epson all-in-one printer, then you will have to separately install the Epson scanner drivers on your computer. You can follow the installation steps given above for installing the Epson L485 scanner drivers as well.
Epson L485 Features
The Epson L485 all-in-one printer has been designed for home and small office users who want to print in high volume on a regular basis.
The Epson inkjet printer uses integrated ink tank technology, which allows it to deliver high quality prints at a very cheap cost. You can easily print thousands of pages with this printer after each refill of its ink tanks.
The maximum print resolution offered by this printer is up to 5670×1440 dpi, while its top print speed is nearly 33 ppm. You can connect this printer with your wired and wireless computing devices by using its USB and Wireless connectivity options.
Ink Cartridge Details: The ink for this ink tank printer is available in one Black (C13T664198), one Cyan (C13T664298), one Magenta (C13T664398) and one Yellow (C13T664498) color ink bottles.
The ink in the black ink bottle can print up to 4500 pages per bottle, while the Cyan, Magenta and Yellow colored ink bottles can deliver a composite page yield of nearly 7500 pages.
